User Access Levels
Each User ID created is assigned an access level which determines which features and settings the user can access or modify.
Access Levels Explained...
- Master – original User ID created when the account was activated; has full access
- Administrator – additional User ID created by the Master user; has full access
- User – additional User ID created by Master or Administrator; has restricted access
Any user with Master or Administrator access may create additional user accounts for leasing staff at your community. They may also manage any existing user accounts that have already been created.
 Note:
Note:
The Master User ID cannot be deleted or deactivated; it cannot be changed, and it cannot be demoted to a lower access level. Only the person logged in with the Master User ID can change the password for the Master User ID.
How to Create Additional User Accounts
- Log into your account (as a Master or Administrator) and click the Settings tab.

- Then click Manage Users.

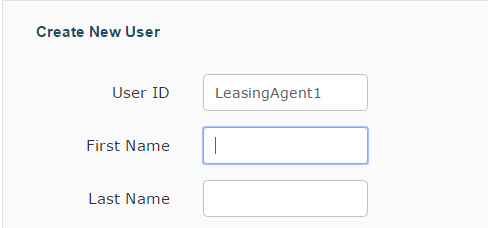
- To create a new user account, simply type a unique User ID into the corresponding field. Tab to the next field and enter the first and last name of the person who will be using this account.
- Select an access level for this user. If you select Administrator, this user has full access to all features and account settings.
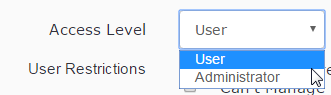
- If you select User, this user has restricted access to certain features and account settings based on the selections you make in the User Restrictions section:

What do these restrictions mean?: - Can't Delete records means the user can't delete lease records from the account
- Can't Manage eSignatures means the user can't view or execute leases that are eSigned
- Can't Change password means the users password can't be changed or reset (by anyone other than a Master or Administrator)
- Can't Order forms/Renew license means the user can't order additional clicks or renew the software license online
- Can't Modify Default Lease means the user cannot access the default lease settings
- Can't Set System Preferences means the user cannot access the account settings
- Can't Manage Locked Fields means the user can't modify which fields in the default lease are locked
- Can't Manage Data-Required Fields means the user can't manage which fields on the lease require completion before printing
- Can't Manage Printing means the user can't manage what forms appear in the print menu
- Can't Manage custom forms means the user can't enable or disable management company custom forms
- Enter a password and confirm it.

Note:
There is a 10-character limit. Passwords may only consist of letters and numbers and are case-sensitive. - For the Active? setting, make sure Yes is selected. (If No is selected, the user's account won't be active and they will not be able to log in.)

- Click the Save User button, and the user account you just created will appear in the user list.
How to Edit a User Account
Any user with Master or Administrator access may edit existing user accounts. If you are not sure who the Master or Administrator user is at your property, you should contact your management company.
Note:
The Master User ID cannot be deleted or deactivated; it cannot be changed, and it cannot be demoted to a lower access level. Only the person logged in with the Master User ID can change the password for the Master User ID.
Log into your account (as a Master or Administrator) and click the Settings tab.
- Then click Manage Users.
- Scroll down to your user list and locate the user account you want to make changes to. Click Edit.
 Note:
Note:
An asterisk will indicate which user is the Master. The icon will indicate which account you are currently logged in with.
 - The selected users current settings will display in the Edit Existing User window. Modify the settings as needed and click the Save User button.
Note:
A User ID cannot be changed. If you change the name in the User ID field and click the Save User button, a NEW user account is created.